
Loading...
Wait a minute

Wait a minute

USING WINGED BLOOD COLLECTION SET
(Preferred method of collection)| Step 1: Check Patient ID & Prepare Materials | |
| ■ Confirm the patient's identity. | |
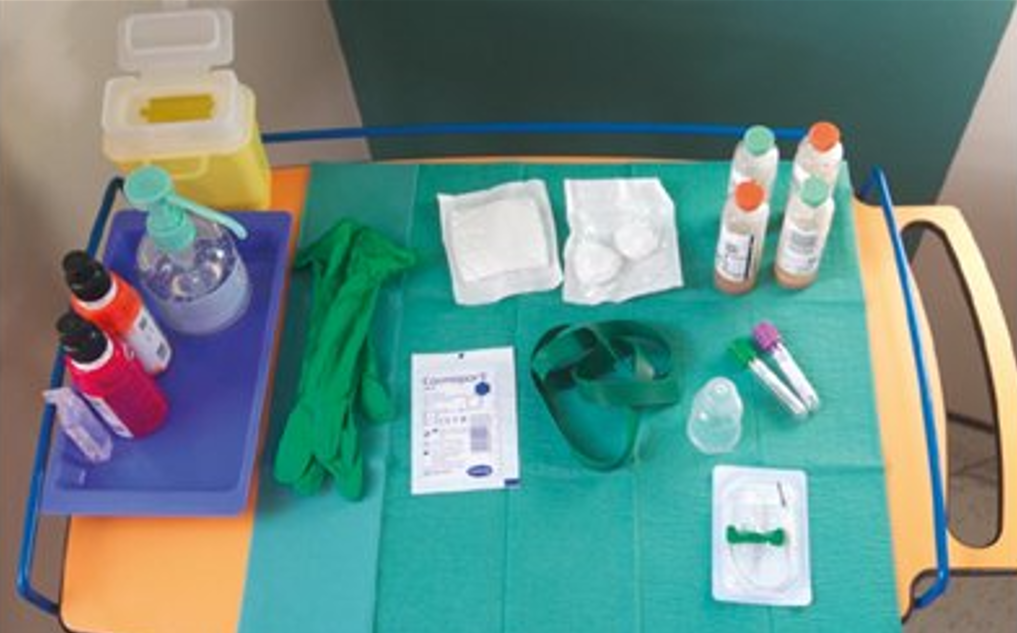 | ■ Prepare the collection kit. |
 | ■ Do not inoculate the bottles 1 month prior to the expiration date. ■ Do not use bottles showing signs of damage, deterioration or contamination. ■ Identify the Fill-to Mark or mark the target fill level on the label. |
| Step 2: Prepare Bottles for Inoculation | |
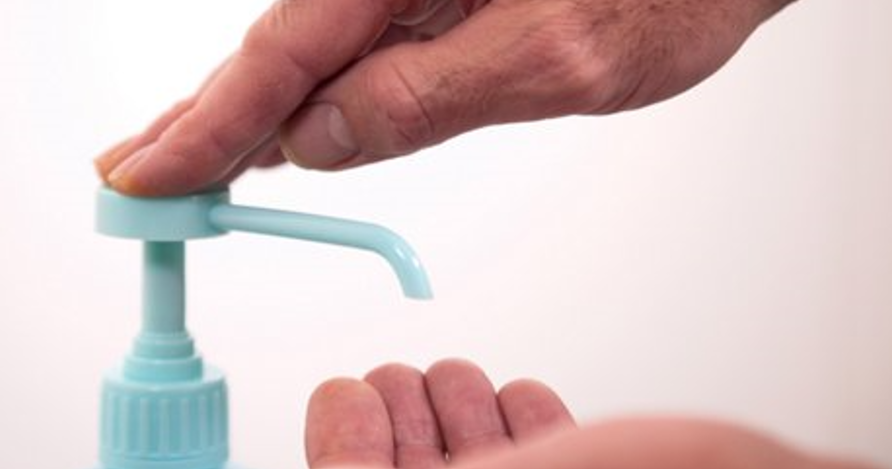 | ■ Wash hands or use an alcohol hand rub. |
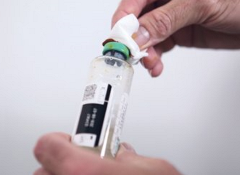 | ■ Remove the plastic "flip-cap''. ■ Disinfect the bottle septum and allow to dry. |
| Step 3: Prepare Venipuncture Site | |
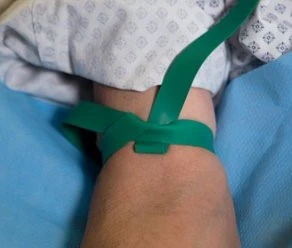 | ■ Apply a disposable tourniquet. |
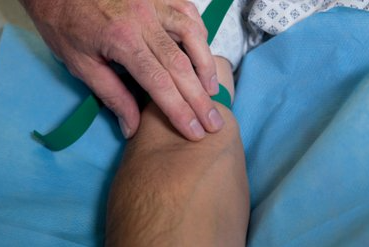 | ■ Palpate to find a vein. ■ Apply clean examination gloves. |
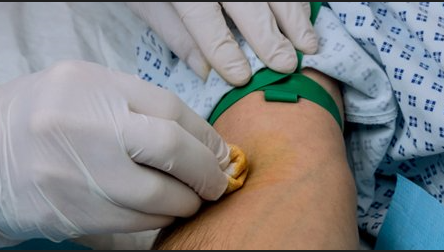 | ■ Disinfect the skin. ■ Allow the site to air dry. |
| Step 4: Venipuncture | |
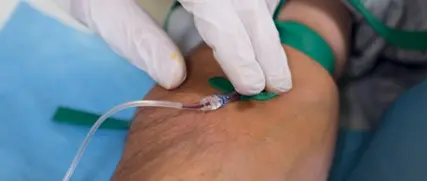 | ■ Attach the collection set to the adapter cap.* ■ To prevent contamination, do not re-palpate. ■ Insert the needle into the prepared vein. |
| Step 5: Bottle Inoculation | |
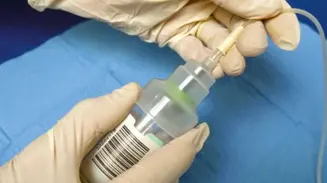 | ■ Collect the anaerobic bottle first. ■ Place adapter cap over bottle top. ■ Press straight down to pierce septum. |
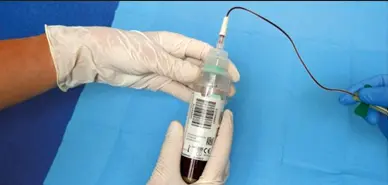 | ■ Hold the bottle upright. ■ Collect 10 ml of blood per adult bottle and up to 4 ml per pediatric bottle. ** |
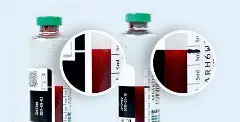 | ■ Ensure the bottle is correctly filled to the Fill-to Mark or target fill level, as shown. ■ Repeat for the anaerobic bottle. |
| Step 6: Other Blood tests | |
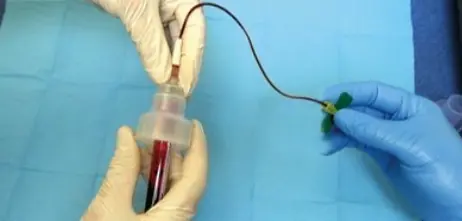 | ■ If collecting blood for additional tests, always collect blood cultures first. ■ If the adapter cap used requires an insert, place the insert into the cap before collecting blood for other tests. |
| Step 7: Finish the Procedure | |
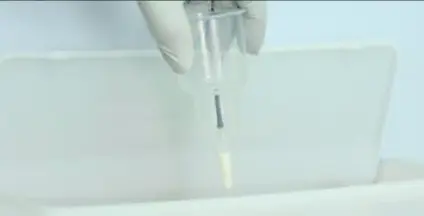 | ■ Discard the needle and syringe into a sharps container and cover the puncture site. ■ Remove gloves and wash hands |
 | ■ Record collection date, time and site and label bottles according to manufacturer's recommendations. ■ Transport inoculated bottles as quickly as possible to the laboratory for testing. |
* The use of blood collection sets without blood collection adapters is not recommended.
**Avoid holding the blood culture bottle in a horizontal or upside-down position or drawing blood with a needle connected directly to the adaptor cap, as fill level cannot be monitored during collection and there is a possible risk of media reflux into the bloodstream.USING NEEDLE AND SYRINGE
Wherever possible. replace conventional needles and syringes with winged blood collection sets. which are safer.| Step 1: Check Patient ID & Prepare Materials | |
| ■ Confirm the patient's identity. | |
 | ■ Prepare the collection kit. |
 | ■ Do not inoculate the bottles 1 month prior to the expiration date. ■ Do not use bottles showing signs of damage, deterioration or contamination. ■ Identify the Fill-to Mark or mark the target fill level on the label. |
| Step 2: Prepare Bottles for Inoculation | |
 | ■ Wash hands or use an alcohol hand rub. |
 | ■ Remove the plastic "flip-cap''. ■ Disinfect the bottle septum and allow to dry. |
| Step 3: Prepare Venipuncture Site | |
 | ■ Apply a disposable tourniquet. |
 | ■ Palpate to find a vein. ■ Apply clean examination glove. |
 | ■ Disinfect the skin. ■ Allow the site to air dry. |
| Step 4: Venipuncture | |
 | ■ Attach the needle to a syringe. ■ To prevent contamination, do not re-palpate. ■ Insert the needle into the prepared vein. ■ Collect the sample. |
| Step 5: Bottle Inoculation | |
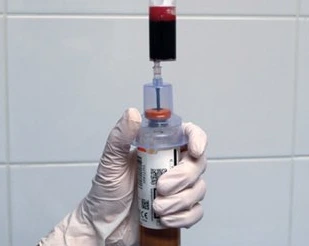 | ■ Inoculate the anaerobic bottle first. ■ Hold the bottle upright. ■ Add 10 ml of blood per adult bottle. |
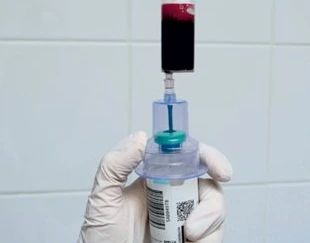 | ■ Repeat for the aerobic bottle. ■ Add 10 ml of blood per adult bottle. ■ Add up to 4 ml per pediatric bottle. |
 | ■ Ensure the bottle is correctly filled to the Fill-to Mark or target fill level, as shown. |
| Step 6: Other Blood tests | |
 | ■ If collecting blood for additional tests, always collect blood cultures first. |
| Step 7: Finish the Procedure | |
 | ■ Discard the needle and syringe into a sharps container and cover the puncture site. ■ Remove gloves and wash hands |
 | ■ Record collection date, time and site and label bottles according to manufacturer's recommendations. ■ Transport inoculated bottles as quickly as possible to the laboratory for testing. |
USING WINGED BLOOD COLLECTION SET
(Preferred method of collection)| Step 1: Check Patient ID & Prepare Materials | |
| ■ Confirm the patient's identity. | |
 | ■ Prepare the collection kit. |
 | ■ Do not inoculate the bottles 1 month prior to the expiration date. ■ Do not use bottles showing signs of damage, deterioration or contamination. ■ Identify the Fill-to Mark or mark the target fill level on the label. |
| Step 2: Prepare Bottles for Inoculation | |
 | ■ Wash hands or use an alcohol hand rub. |
 | ■ Remove the plastic "flip-cap''. ■ Disinfect the bottle septum and allow to dry. |
| Step 3: Prepare Venipuncture Site | |
 | ■ Apply a disposable tourniquet. |
 | ■ Palpate to find a vein. ■ Apply clean examination gloves. |
 | ■ Disinfect the skin. ■ Allow the site to air dry. |
| Step 4: Venipuncture | |
 | ■ Attach the collection set to the adapter cap.* ■ To prevent contamination, do not re-palpate. ■ Insert the needle into the prepared vein. |
| Step 5: Bottle Inoculation | |
 | ■ Collect the anaerobic bottle first. ■ Place adapter cap over bottle top. ■ Press straight down to pierce septum. |
 | ■ Hold the bottle upright. ■ Collect 10 ml of blood per adult bottle and up to 4 ml per pediatric bottle. ** |
 | ■ Ensure the bottle is correctly filled to the Fill-to Mark or target fill level, as shown. ■ Repeat for the anaerobic bottle. |
| Step 6: Other Blood tests | |
 | ■ If collecting blood for additional tests, always collect blood cultures first. ■ If the adapter cap used requires an insert, place the insert into the cap before collecting blood for other tests. |
| Step 7: Finish the Procedure | |
 | ■ Discard the needle and syringe into a sharps container and cover the puncture site. ■ Remove gloves and wash hands |
 | ■ Record collection date, time and site and label bottles according to manufacturer's recommendations. ■ Transport inoculated bottles as quickly as possible to the laboratory for testing. |
* The use of blood collection sets without blood collection adapters is not recommended.
**Avoid holding the blood culture bottle in a horizontal or upside-down position or drawing blood with a needle connected directly to the adaptor cap, as fill level cannot be monitored during collection and there is a possible risk of media reflux into the bloodstream.USING NEEDLE AND SYRINGE
Wherever possible. replace conventional needles and syringes with winged blood collection sets. which are safer.| Step 1: Check Patient ID & Prepare Materials | |
| ■ Confirm the patient's identity. | |
 | ■ Prepare the collection kit. |
 | ■ Do not inoculate the bottles 1 month prior to the expiration date. ■ Do not use bottles showing signs of damage, deterioration or contamination. ■ Identify the Fill-to Mark or mark the target fill level on the label. |
| Step 2: Prepare Bottles for Inoculation | |
 | ■ Wash hands or use an alcohol hand rub. |
 | ■ Remove the plastic "flip-cap''. ■ Disinfect the bottle septum and allow to dry. |
| Step 3: Prepare Venipuncture Site | |
 | ■ Apply a disposable tourniquet. |
 | ■ Palpate to find a vein. ■ Apply clean examination glove. |
 | ■ Disinfect the skin. ■ Allow the site to air dry. |
| Step 4: Venipuncture | |
 | ■ Attach the needle to a syringe. ■ To prevent contamination, do not re-palpate. ■ Insert the needle into the prepared vein. ■ Collect the sample. |
| Step 5: Bottle Inoculation | |
 | ■ Inoculate the anaerobic bottle first. ■ Hold the bottle upright. ■ Add 10 ml of blood per adult bottle. |
 | ■ Repeat for the aerobic bottle. ■ Add 10 ml of blood per adult bottle. ■ Add up to 4 ml per pediatric bottle. |
 | ■ Ensure the bottle is correctly filled to the Fill-to Mark or target fill level, as shown. |
| Step 6: Other Blood tests | |
 | ■ If collecting blood for additional tests, always collect blood cultures first. |
| Step 7: Finish the Procedure | |
 | ■ Discard the needle and syringe into a sharps container and cover the puncture site. ■ Remove gloves and wash hands |
 | ■ Record collection date, time and site and label bottles according to manufacturer's recommendations. ■ Transport inoculated bottles as quickly as possible to the laboratory for testing. |